I recently moved this site from GitHub Pages to Cloudflare Pages. GitHub Pages was easy to get started with when the project was simple, but as the site evolved I found myself outgrowing its built-in capabilities. This site is built with Astro and now includes a gallery with optimized images and derived metadata along with statically generated blog posts, so I wanted a hosting setup that could easily handle more than a static deploy.
One big advantage of Cloudflare Pages is that it can build and deploy directly from a private repository for free. On each change to main, it can automatically run configured build scripts and deploy the site. Since I keep drafts and other unpublished work in the same source repo, being able to publish from a private repo was a huge plus.
There’s also a generous free tier, which includes 500 page builds per month and no limits on bandwidth. One downside is a 20,000 file limit, but that’s plenty for a small personal site.
After migrating, I wanted a way to automatically schedule posts. Since this site is statically generated, one way to accomplish this is with periodic builds. At build time, visibility is decided by comparing a post’s scheduled date against the current date and only including posts marked ready to publish. This is easy to set up within Cloudflare without involving external dependencies by using a deploy hook and a worker.
Creating a Deploy Hook
A deploy hook is a private endpoint that allows a Pages build to be triggered by a POST request. To create one, open the Pages project and look for “Deploy Hooks” under “Settings”. We’ll give the deploy hook a meaningful name, like periodic-deploy, and let it trigger builds on the main branch.

Once we create the deploy hook, it’ll generate a unique URL. Since there’s no additional authorization associated with deploy hooks, anyone who has access to the URL can trigger builds on our project. If it leaks, the main risk is exhausting the monthly builds limit, but it’s better to treat the URL as a secret.
Creating a Worker
Cloudflare Workers are a form of serverless compute, which can execute any code we configure based on an event-driven model. We can create a new worker on the “Workers & Pages” screen by clicking on “Create Application”. We’ll start with the “Hello World” template and deploy it.
By default, workers expose a domain-based trigger that allows us to manually trigger the worker via URL. This looks something like <worker-name>.<subdomain>.workers.dev. The Hello World example uses the Worker’s Fetch Handler API to respond to HTTP requests made to this URL.
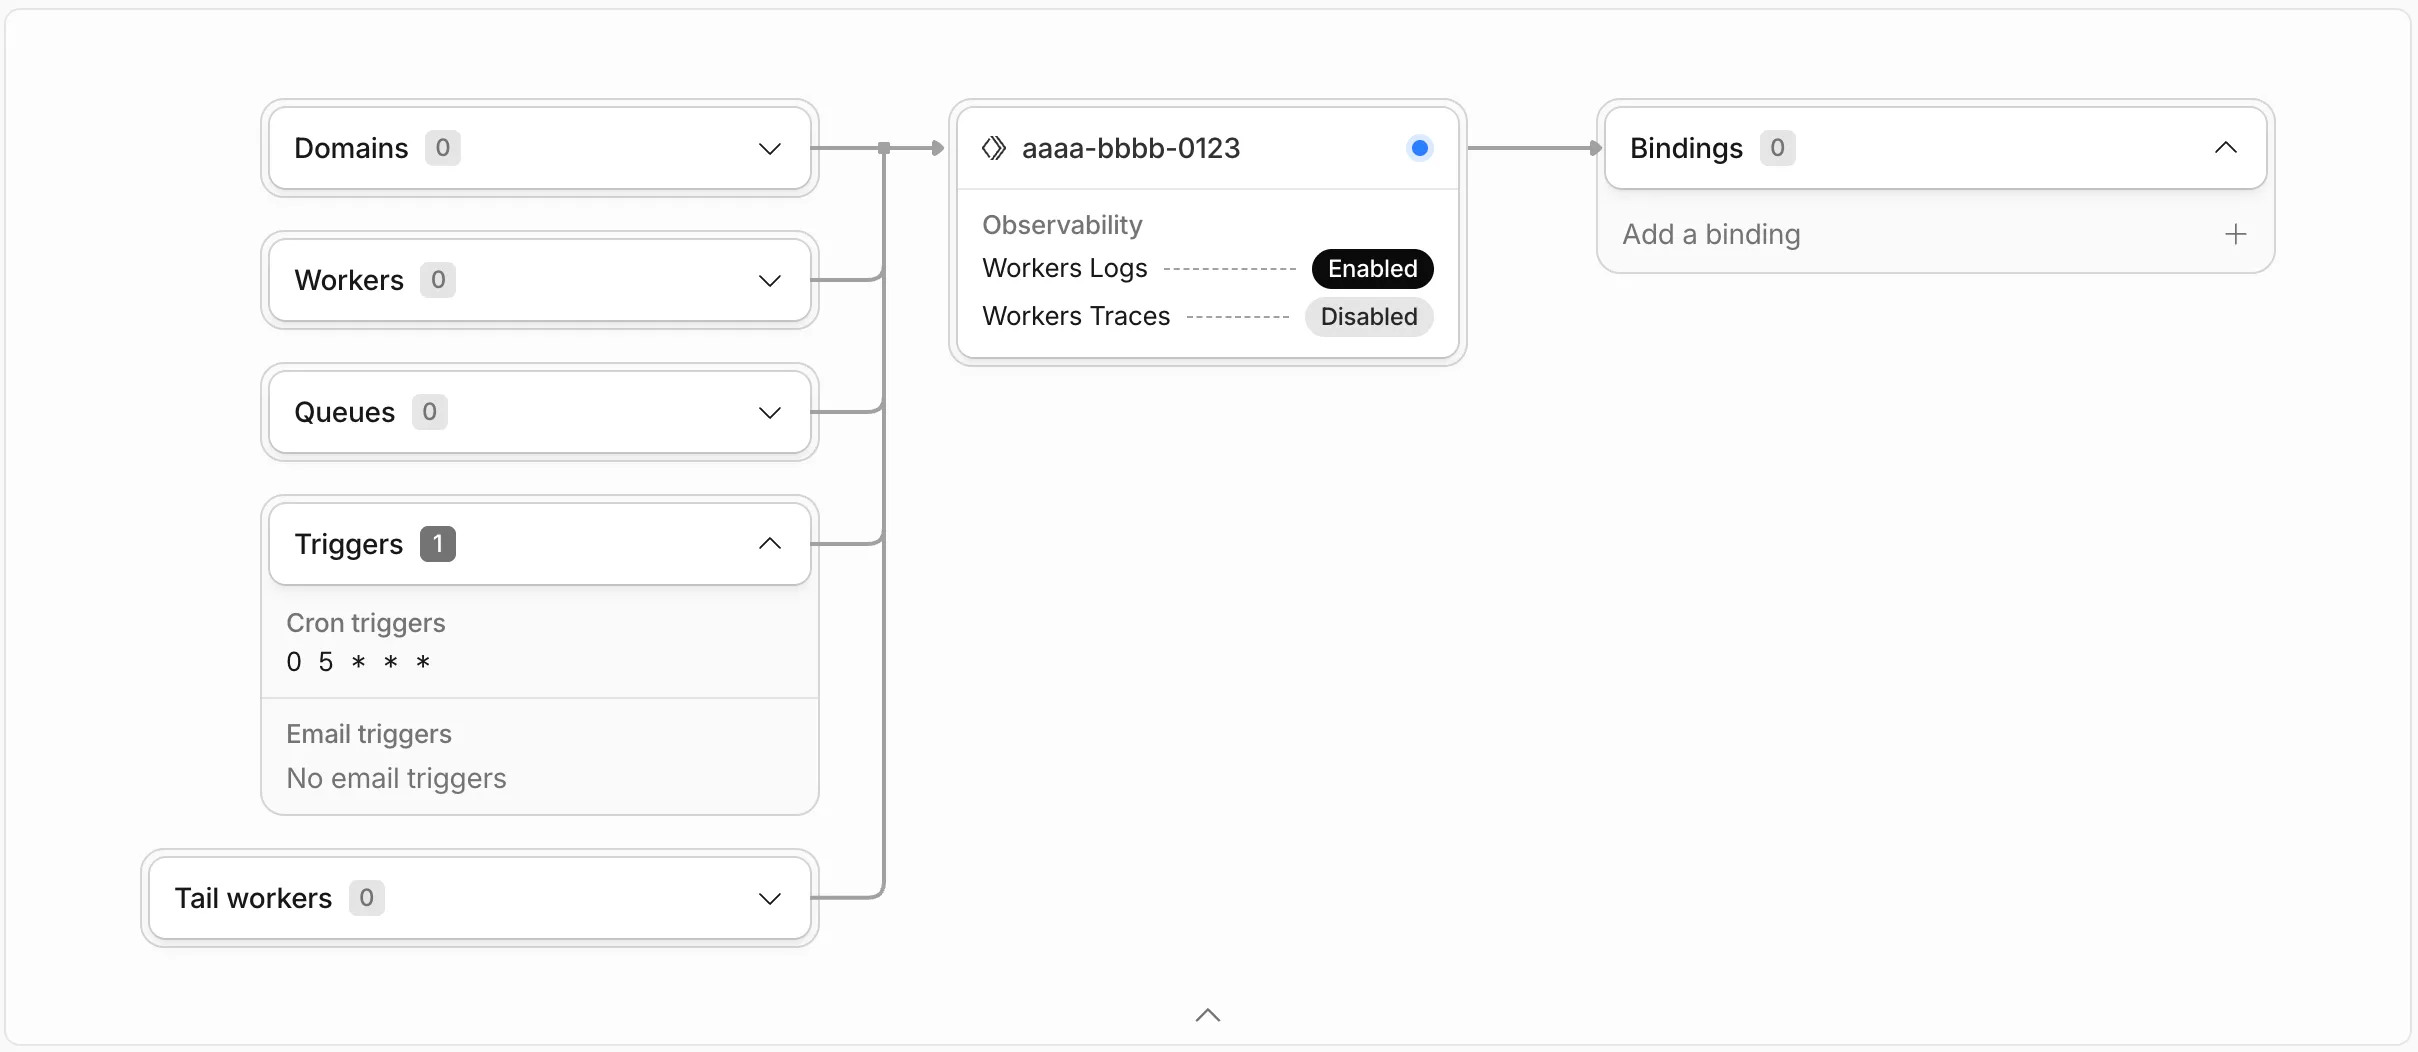
But since we’re building a scheduled trigger, we won’t be using any of this. Go ahead and disable the domain-based trigger under Settings -> Domain & Routes. We don’t want to make this worker accessible over a public URL.
Configuring Daily Deploys
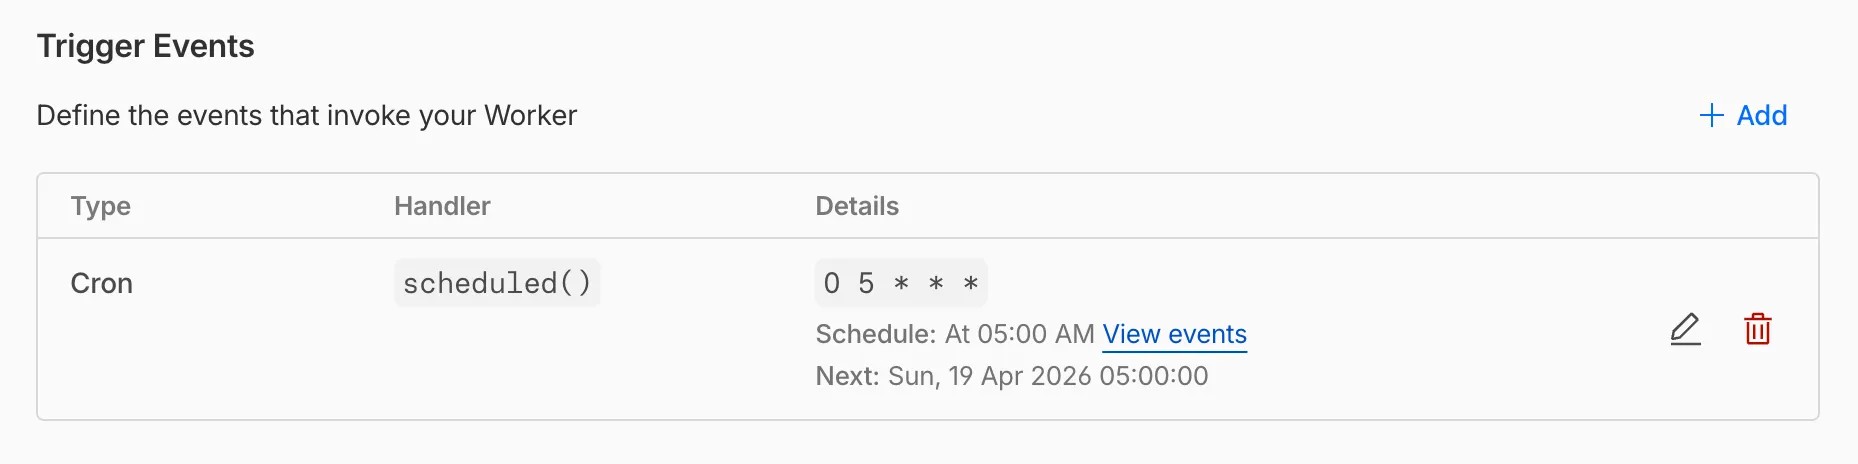
Workers support Trigger Events, which can include a schedule or messages from a queue. Moving to the “Trigger Events” section on the same page, we’ll create a new cron trigger. In this case, I want the deploy to run in the evening in North America, so I’ll set it to run daily at 5AM UTC.
Setting up a Deploy Hook URL Secret
Next, we’ll want to configure our deploy hook URL as an environment variable. Under “Variables and Secrets,” we’ll create a new DEPLOY_HOOK_URL secret, with the value set to the deploy hook we just created.

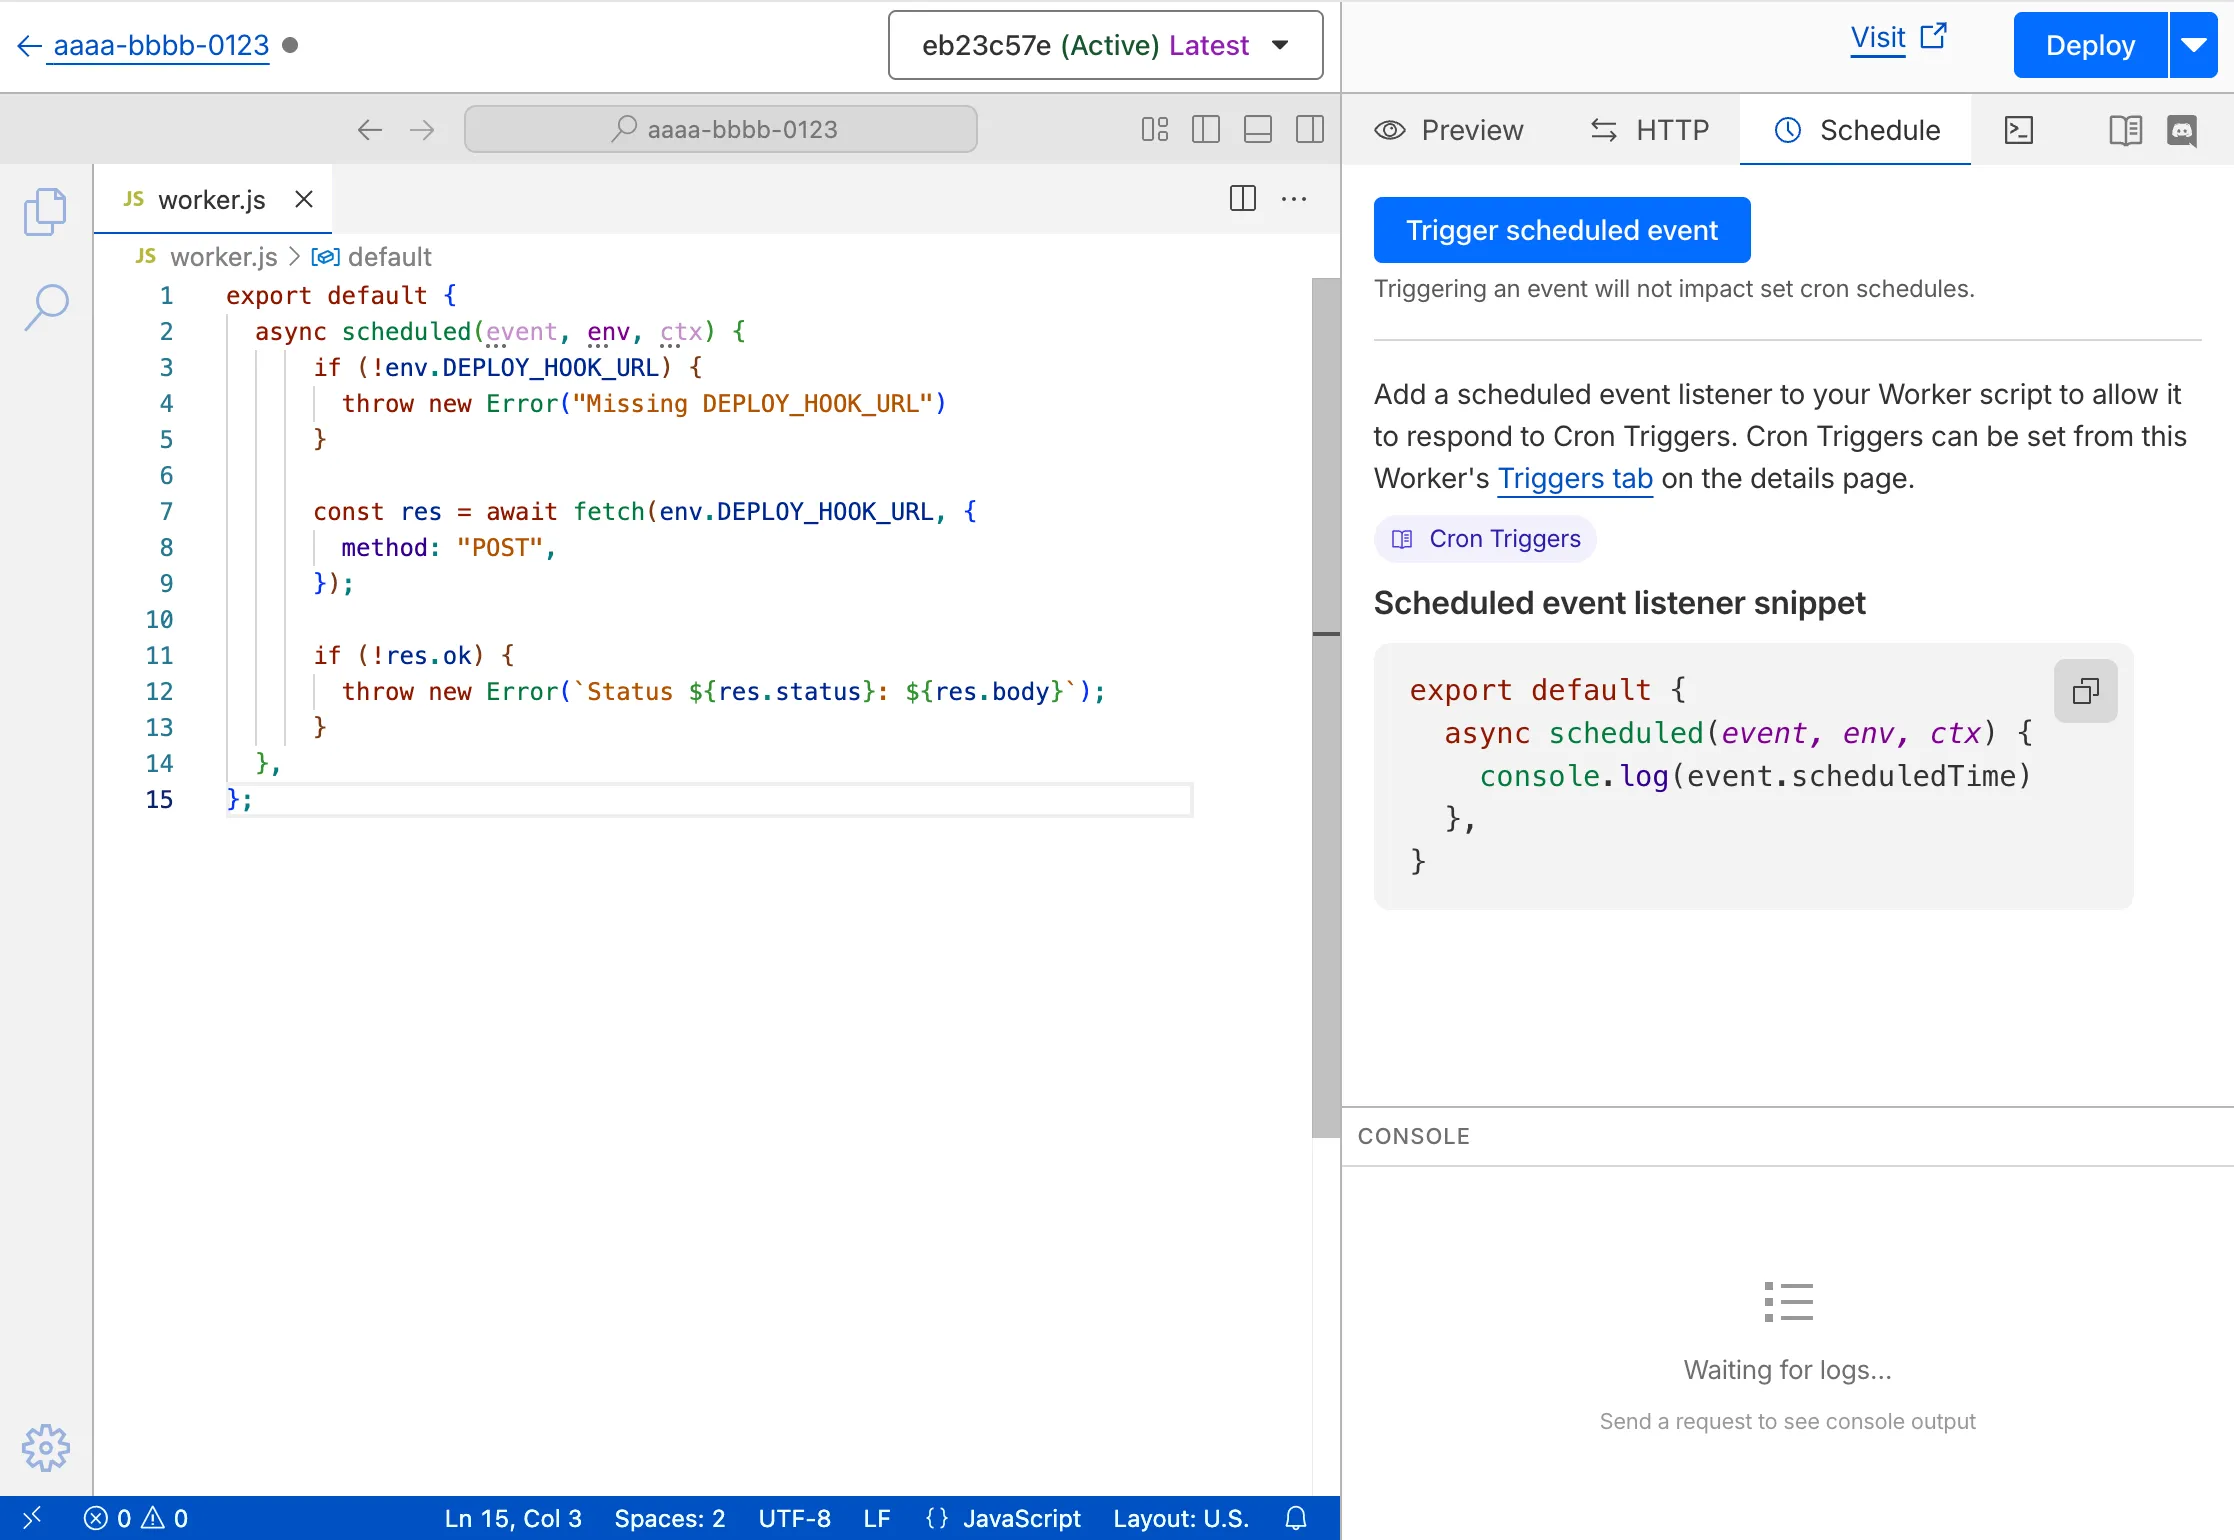
Updating the Worker’s Code
With the secret set up, we’ll want to edit the code for the worker to POST to our deploy hook. The web-based code editor will suffice for our purposes. This will run each time the worker is triggered by the cron schedule. We’ll throw an error if the hook request fails, to make it easier to debug.
export default {
  async scheduled(event, env, ctx) {
    if (!env.DEPLOY_HOOK_URL) {
      throw new Error("Missing DEPLOY_HOOK_URL");
    }

    const res = await fetch(env.DEPLOY_HOOK_URL, {
      method: "POST",
    });

    if (!res.ok) {
      throw new Error(`Status ${res.status}`);
    }

    const data = await res.json();
    console.log(data);
  },
};
Because the worker is being invoked from a cron trigger, we’re using the Scheduled Handler API, which automatically populates useful metadata about the schedule and environment. If we wanted to, we could even configure multiple cron triggers and match against event.cron to figure out which trigger fired.
Click on the blue “Deploy” button to save these changes.
Testing the Worker
It’s possible to test the schedule locally by using Cloudflare’s Wrangler CLI tool to simulate a worker environment and manually kick off a scheduled event. However, that’s overkill for a simple use case like this where most of the surface area for errors is in misconfiguration.
The web-based code editor allows us to manually trigger a scheduled event. Annoyingly, it looks like this doesn’t surface any errors anywhere or track any record of the execution in logs, even though it does seem to execute the handler.
After manually triggering, we can check the Page’s deploy history to verify that a build was kicked off.
Observability
Once the cron trigger has fired, the easiest way to get more visibility into any issues is through the “Observability” tab, which shows each invocation of the worker. There are detailed logs that show which trigger fired, parameters that were passed to the handler, and stack traces associated with any errors.

There’s also a separate “Cron Events” table accessible through the cron trigger configuration. This mostly shows the status of recently triggered events, so it’s not as useful as looking through logs.
Conclusion
With this in place, we can automatically kick off builds and new scheduled posts can go live without any manual intervention. After these steps, our worker setup should look something like this, since the domain trigger is disabled and we only have one cron trigger.
The free tier provides 100,000 worker requests per day with 10ms of CPU time each, so our once-daily webhook POST won’t even register against these limits. Given how simple this was to setup and the large daily limits for hobby projects, I’m excited to keep experimenting with workers.